
MODEL V TUTORIAL
I Before you start
Like all other SLA/DLP/LCD 3D printers, there will be a learning curve you need to climb before you can really make the most use of your MODEL V. Some people can use the printer and software very proficiently within days, some may take longer. It depends on how you practice and how much thought you put into it. You may experience a few failures in the beginning. But with our Help Groups and Customer Service Team in the US, we will help you in each step of the way until you can be on your own.
A. Age Restriction
Manufacturer recommended age: 13 Years and up.
XAYAV MODEL V 3D printer is not a toy. Children younger than 13 years old to use XAYAV MODEL V 3D printer under parental supervision is highly recommended.
B. General Safety Instructions
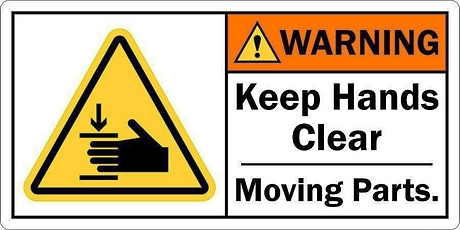
CAUTION: The XAYAV MODEL V 3D printer includes moving parts that can cause injury. Keep hands clear while the printer is in operation.
-
Always wear gloves and proper eye protection while handling resin or newly printed objects.
-
Always be careful when using scraper, file, knife or other sharp tools.
-
Operating temperature: 15~30℃ or 59~85℉.
- Operating humidity: 20~70%.
- Do not use the printer beyond the temperature and humidity range.
- STOP using the printer and UNPLUG the power cord immediately if the printer exhibits a distinct change in performance or anything that may indicate a malfunction. Contact us for support.
- Keep the printer and 3D printing resin out of the reach of small children.
C. Electrical Safety Instructions
-
Power input: 85~264 VAC / 47~63 Hz.
-
Do not use the printer beyond the above power input range.
-
Do not clean the printer with running water. UNPLUG the power cord immediately if exposed to water.
-
Do not rest anything on the power cord.
-
The printer will draw a maximum of 2A from your power outlet. Do not overload a power outlet or a power strip.
-
Always use the USB cable and power cord came with the printer or XAYAV certified products.
-
Do not open the printer casing with power cord plugged in. Always unplug the printer before servicing the printer.
-
Do not try to power the printer if there is a known issue or malfunction with the printer before the problem is solved.
-
Do not try to connect the USB cable to your printer if there is a known issue or malfunction with the printer before the problem is solved.
-
Replace the USB cable or the power cord if damaged
-
Unplug all cables and power cord when the printer will not be use for a while.
D. Disposal instructions
Do not throw the printer or parts into the waste. To minimize pollution, please contact our customer service and return the printer to XAYAV for recycling.

E. Minimum computer requirements
-
Operating System:
-
Processor/CPU:
-
Graphics/GPU:
-
Video Output:
-
Hard Drive:
-
RAM:
-
Networking:
-
Software:
Windows 7/8.1/10, 32-bit or 64-bit, Home Premium or higher, fully updated
Intel Pentium dual-core or AMD A4 APU
Integrated graphics with 1GB shared memory or above
2k HDMI
80 GB Free hard drive space
4GB
10/100/1000 Ethernet adapter or Wi-Fi adapter
Creation Workshop
F. Contact us if you have any question about this tutorial
II Let's get started
GET THE MOST OUT OF YOUR MODEL V
LET'S START PRINTING TODAY!
A. The Very Basics

-
Place your printer on a flat, stable and leveled surface.
-
Never grab/move your printer by the Z-rail.
-
Use your printer indoor.
-
Power your printer with the power cable. Once you plug in the power cable, the front button will breath blue light, indicating the printer is in sleep mode. Push the front button, the blue light will stay on, indicating the printer has powered on.
-
Connect your printer with the USB cable (command communication) and the HDMI cable (printing image communication). NOTE: you can communicate with your printer if the USB cable is connected even when the power cable is not plugged-in (The printer can be power from the USB). The front button will light up but you cannot move the platform, nor turn on the UV LED; attempting to do so without the power cable plugged-in can trigger faults. Normally, unplug all the cables and wait a few seconds will clear the fault.
-
The fans in the printer will turn on and off automatically controlled by a few temperature sensors and printer operation status.
-
The front button serves as the power on/sleep and emergency stop.
-
When the printer is sleeping, press the button once to power it on. During sleeping, the blue light on the front button will be breathing and the printer will not receive any command. Sometimes, the fans will keep running until the temperature drops down even when the printer is in sleep mode.
-
When the printer is powered on, the light will stay on.
-
Toggle the button will turn the printer on or sleep.
-
During operation, press the front button will shut the printer down immediately no matter what the printer is doing. This serves as an emergency stop function. After 3 seconds the printer is shut down, it goes into sleep mode. Press the button again to wake it up. The printer will not resume what it was doing previously.
-
-
DO NOT block or cover the air intake and exit on the printer. DO NOT use your printer on a soft surface like rug and carpet. KEEP the surface where the printer is placed clean.

-
The platform arm and the platform are adjusted to level before shipping. You DO NOT need to level your platform. DO NOT loose or change the screws indicated below unless you are instructed to do so by XAYAV customer service. Each platform is carefully paired with the platform arm to ensure absolute level for each MODEL V before shipping. Mark your platforms to prevent mixing one platform with another. Since you will need to wash the platform very often, it is recommended to mark your platforms with punch stamps. You can buy a punch stamps toolset in your local hardware store or online for $10~25. Check out this video to learn how to use punch stamps. If you need to replace your platform for any reason, please order a Platform Replacement Kit in our store or contact customer service.

-
You need to use software like Creation Workshop or use The Wi-Fi BOX to control your printer.
-
Creation Workshop and NanoDLP can only slice and print STL file. NanoDLP can print with PNG files, but the software creates PNG files probably also use STL file.
You can either make your own model and convert them into STL files with 3D modeling software. Or you can download from others. There are many websites provide free STL model downloads available. We are here provide a few websites for your information.
Thingiverse: https://www.thingiverse.com/
MyMiniFactory: https://www.myminifactory.com/
pinshape: https://www.pinshape.com/
-
The printer will automatically power off if no command received from the host within the timeout period. This is to protect the printer and the resin in the event of lost connection. The default timeout is 300 seconds.
-
Always place the lid on the printer during printing.
-
Always wear gloves and eye protection while handling resin.
-
IMPORTANT: Use XAYAV pre-configured Creation Workshop software, machine/resin profiles for NanoDLP only. Other machine/resin profiles may not work.
-
The resin profiles pre-loaded in the Creation Workshop software or the Wi-Fi box can be outdated. All up-to-date resin profiles are here.
-
New resin and new thickness profiles are always being tested by our engineers and we will also take inputs from all MODEL V users and make adjustments on the profiles. Neither the CW software nor the NanoDLP on the WiFi box will be updated automatically. Also, the profiles are a benchmark, each printer can vary slightly. Find the right settings for your machine by adjusting slightly around the profiles online.
B. Installing Driver on Your PC
Plug the power cable to your MODEL V. Wait about 3 seconds, and then plug the USB cable into both your MODEL V and your PC.
For Windows Users:
Your PC (Windows 8/8.1 and Windows 10) should automatically install the best driver for your MODEL V. If your PC fails to find the driver for your printer. Download the driver here:
Unzip the driver file. Install "dpinst-amd64.exe" driver for 64-bit system or install "dpinst-x86.exe" driver for 32-bit systems. Installing the driver with an Administrator account or use "Run as administrator". When you see the window below, click "Install" on all pop-up windows to finish install the driver.


Also, installing Arduino IDE on your PC is recommended. Its Serial Monitor can be very useful in the future.
Please refer to the links below and follow the instruction to install Arduino IDE.
For Windows users: https://www.arduino.cc/en/Guide/Windows
For MacOS users: https://www.arduino.cc/en/Guide/MacOSX
For Linux users: https://www.arduino.cc/en/Guide/Linux
Download Arduino IDE: https://www.arduino.cc/en/Main/Software
If you have a problem installing the driver on Windows. Please refer to the link below for additional information. Or contact our Customer Service for help. Note that Windows XP is not officially supported.
https://learn.sparkfun.com/tutorials/pro-micro--fio-v3-hookup-guide/installing-windows
For Mac & Linux Users:
Please follow the instruction here:
https://learn.sparkfun.com/tutorials/pro-micro--fio-v3-hookup-guide/installing-mac--linux
C. Check Firmware Version
It is very important to keep your MODEL V's firmware up-to-date. Sometimes critical fail to apply firmware update can cause unsuccessful print or even damage to the printer. Please follow the steps below to check if your MODEL V has the latest firmware.
-
Connect the printer to your PC with the USB cable or connect a Wi-Fi BOX.
-
Open a serial monitor, like Arduino Serial Monitor or the Terminal when using Wi-Fi BOX (NanoDLP). DO NOT use Creation Workshop as it won't display received message.
-
Send Code "M36" to check the current firmware version on your MODEL V.
-
Go to our DOWNLOAD (click here) page and check if you have the latest firmware on your MODEL V.
-
If your firmware version is not the latest. Download the latest firmware. Unzip it onto your desktop. Connect your MODEL V to your PC with the USB cable (you can upload firmware without the power cable). Run Uploader App as administrator; select "Device in Serial Mode" option and the COM port; load the hex. firmware file. Finally upload the firmware file to your MODEL V.
-
Some user may experience failure (uploader not responding) when using the uploader for the first time. It might because Windows is automatically installing the bootloader COM port driver for the first time. Try again after the driver is installed or it may say "Device unplugged". You may need to force close the uploader and re-launch it again.
-
The upload process takes only a few seconds, the upload is finished when the black command window disappears. After the upload is finished. Use code M36 to double check if you have successfully uploaded the firmware into your MODEL V.
D. G-code List For MODEL V (Firmware Version 7.12.8 and up)
-
G0 & Z: Rapid Move.
Use G0 Z or just Z to move the platform. The unit is in mm and it's relative coordinate. For example, use Z10 (or G0 Z10) to move the platform 10mm up and Z-10 (or G0 Z-10) to move the platform 10mm down. If you use Z10 twice, the platform will move 20mm up. -
G1: Move. + 'Z' + 'F': The feed-rate per minute of the move (0-5000).
-
G4: Pause the machine for a period of time. + 'P': Time to wait, in milliseconds.
-
G20: Set Units to Inches
-
G21: Set Units to Millimeters.
-
G28: Move to Origin (Home) if the printer is zero-calibrated. Move to machine origin (G100) if the printer is not calibrated.
-
G90: Set to Absolute Positioning
-
G91: Set to Relative Positioning
-
G92: Set Z Position to 0.0
-
G100: Move to Machine Origin.
-
M2: Printing Complete.
-
M8: Turn On Case Fan (100% PWM).
-
M10: Turn On UV LED Fan (100% PWM).
-
M36: Return Current Firmware Version.
-
M106: Turn On UV LED. + 'S': UV LED Power Setting (0-255).
-
M107: Turn Off UV LED. Printing Complete.
-
M111: Temporary Disable Timeout Auto-Power-Off.
-
M122: Return All Sensor Data.
-
M171: Preform Zero Calibration.
-
M181: Return Zero-calibration Result.
-
M203: Set Rapid Feed-rate. + 'P': The feed-rate per minute (0-5000).
-
M291: Set Non-response Timeout Value. + 'P': Time to timeout reboot, in seconds (150-600).
-
M370: Clear EEPROM. This will clear the zero-calibration data, custom rapid feed-rate and custom timeout value.
IIi creation workshop
The video below is a general tutorial on how to use Creation Workshop. Please read the rest of this section to help you understand how to use Creation Workshop with your MODEL V.
Download the Creation Workshop software from our Download page. The machine settings and resin profiles are already pre-configured. You can also just download the machine setting profile and the resin profile if you already have Creation Workshop in place. Copy and paste the machine setting profile into the "Machines" folder and the resin profile into "Profiles" folder.
IMPORTANT: You should turn off all screen saver and power saving functions on your PC to prevent interruptions during printing. If the PC turns off its monitor or goes to sleep while printing. The printing process will stop and you may not be able to resume it later.
Configure Machine Section
-
Go to "Windows display setting", click on your printer display; in "Scale and Layout", the size of text, apps and other items should be 100% and the resolution should be 2560 x 1440 or 1440 x 2560 Landscape; in "Multiple displays", change the setting to "Extend these displays" as the screenshots shown below.
-
If you do not see a second display (your printer's display) at all, you want to check if the HDMI cable has been properly connected and if your PC supports HDMI 1.4 or higher standard.
-
Go to "Configure" tab in the CreationWorkshop software, then go to "Configure Machine".
-
The correct build size for MODEL V is X: 121, Y: 68, Z: 200.


-
You should see your printer's display (2560*1440) under "Available Displays"; add this display to "Configured Displays" by clicking the "+" icon. If you do not see your printer's display, use the "Refresh" button to refresh the "Available Displays".
-
After you have added the printer's display, it should appear under "Configured Displays" as the screenshot shown below.
-
If you have an issue with your printer display connection, for example, your software is properly setup however nothing is displayed on the printer during printing. You might want to remove it from "Configured Displays" by clicking the "-" icon and add it back again.

-
Next, connect to your MODEL V in "Machine Connection". Not in "Projector Control". Click the "Configure" button to find your printer's COM port under the "Port" list. Keep the Speed and Data Bits as "115200" and "8".
-
If you want to print with a mask, Configure and enable the mask in "Projector Control".
-
You can download the universal mask profile for MODEL V in the Download section and add it to Creation Workshop if it is not pre-configured already.
Learn more about Mask here. -
Leave everything else as is.
-
Make sure to click the "Apply" button if you want to save the change you have made.
Configure Slicing Profile Section
-
There are resin profiles pre-configured in this section. But you can still add your own resin profile or edit the existing ones.
-
Leave everything else as is.
-
DO NOT change anything in the "GCode" tab.
Configure Lift and Sequence Time
-
We provide you with 2 recommended settings. If you want to try your own settings, you will need to find the best "Lift and Sequence Time (ms)" yourself as the Auto Calc is not accurate.
-
If you download our pre-configured Creation Workshop, the Lift and Sequence time would be the one on the left, which is better for thin resin like FTD SW or MONOCURE RAPID. You can also try to use the one on the right if you need a slower lifting speed. This usually works better for thick resin, such as Bluecast and most dental resins.


Control Section
-
In "Manual GCode Commands", you can manually send G-code to your MODEL V but cannot receive messages from it due to the MODEL V uses a full-speed USB 2.0 protocol instead of a low-speed UART protocol to establish communication to your PC. Creation Workshop's serial monitor is unable to display the messages from MODEL V. For Creation Workshop users, A Serial Monitor (please visit our Download page) is required for you to see the messages from your MODEL V.
-
You can use the "Home" button to command your MODEL V to move the platform to the home origin.
Resin Profile Update
We will constantly be testing new resin from different manufacturers and update the resin information and printing settings at the PRINTING MATERIAL page.
IV NanoDLP
Go through the general tutorial videos below to learn about NanoDLP. Please read the rest of this section to help you set up your NanoDLP to work with your MODEL V properly.
-
Download the resin profile for our Download Page and import them in "Resin Profiles" tab.
-
If you want to create a new resin profile, you can clone one of the profiles we have and change the numbers like the layer thickness and curing time. Do not make changes to G-code settings otherwise, your profile may not work.
-
For any resin profile, the "GCODE Before Each Layer" should always look like this:
M106 S255
[[Delay 0.05]] -
Like the Creation Workshop, we also provide two different lifting speed for the different type of resins. For thin resin, you can use the fast lifting speed and the thick resin, the slow lifting speed is recommended. For any fast lifting resin profile, the "GCODE After Each Layer" should always look like this:
M106 S0
[[Delay 0.05]]
G1 Z[[ZLiftDistance]] F400
[[Delay 2]]
G1 Z-{[[ZLiftDistance]]-[[LayerThickness]]} F300
[[Delay 2]]
M106 S255
[[Delay 0.05]]
For any slow lifting resin profile, the "GCODE After Each Layer" should always look like this:
M106 S0
[[Delay 0.05]]
G1 Z[[ZLiftDistance]] F250
[[Delay 2.8]]
G1 Z-{[[ZLiftDistance]]-[[LayerThickness]]} F250
[[Delay 2.5]]
M106 S255
[[Delay 0.05]] -
For any resin profile, the "Override Start of Print GCode" should always look like this:
M106 S255
[[Delay 0.05]] -
For any resin profile, the "Override Resume Print GCode" should always look like this:
M106 S255
[[Delay 0.05]] -
For any resin profile, the "Override Print Stop GCode" should always look like this (the "Z100" means the building platform will move 100mm up after each print has completed. You can change this number to your needs):
[[Delay 0.5]]
M107
[[Delay 0.05]]
Z100
[[Delay 0.05]] -
For any resin profile, the "Override X/Y Resolution" should always be 47.200000

-
Download the resin profile for our Download Page and import them in "Resin Profiles" tab.
-
Download the machine setup profile for our Download Page and import it in "Setup" - "Tools". Or you can manually setup the "3D Printer Board" like this:


-
Use the "Terminal" to send G-code and communicate with your MODEL V.
-
Use G28 code to home the platform.
-
You can leave other settings the way they are and start printing.
-
It is import to know that, if your printer goes into sleep mode (the front button being pressed or no USB communication auto powering off) before starting your print, you need to reboot your Wi-Fi BOX to re-establish the USB connection. So it is recommended to turn on your printer when everything is ready.
Resin Profile Update
We will constantly be testing new resin from different manufacturers and update the resin information and printing settings in the PRINTING MATERIAL page.
V other useful software
A. ChiTu DLP Slicer
ChiTu DLP Slicer is a print preparation software. You can use ChiTu DLP Slicer to prepare your stl. model, change size and orientation, add support structures and export the model with the support structures. You can then use Creation Workshop or NanoDLP to print your model with support structures generated by ChiTu DLP Slicer.
ChiTu DLP Slicer has advanced high-performance support generation functions. It has been officially tested and approved. It is highly recommended for MODEL V 3D Printer. The software has both Windows and Mac version for download here.

B. Print Studio
Print Studio is Autodesk's print preparation software. Print Studio keeps your production moving by analyzing, fixing and preparing your 3D files. Like ChiTu DLP Slicer, you can use Print Studio to prepare your stl. model, change size and orientation, add support structures and export the model with the support structures. You can then use Creation Workshop or NanoDLP to print your model with support structures generated by Print Studio. Watch the video below to learn how to use Print Studio.

You can use any of the printers in Print Studio to create support structures. But you want to make sure you resize your model to fit MODEL V's building area. If you want to add MODEL V to the printer list in Print Studio, please refer to the links below learn how to add a custom printer or change an existing one on the printer list.
Go to the bottom of this page to find the printer specs.

C. Meshmixer
Autodesk's Meshmixer is state-of-the-art software for working with triangle meshes. Meshmixer is known for its advanced mesh editing functions and automatic support structure generating function. Just like Print Studio, you can use Meshmixer to prepare your stl. model, change size and orientation, add support structures and export the model with the support structures. You can then use Creation Workshop or NanoDLP to print your model with support structures generated by Print Meshmixer.
Watch the video below to learn how to use Meshmixer.

D. FlashPrint
FlashPrint provides a simple and easy to use user interface for preparing your 3D designs for printing on the Flashforge 3D printers. Like Print Studio and Meshmixer, you can still use FlashPrint to generate support structures and export the supported model as stl. files, then use Creation Workshop or NanoDLP to print on a MODEL V printer.
Watch the video below to learn how to use FlashPrint.

VI before printing
A. Zero-calibrate The Platform

IMPORTANT: Zero-calibration is required before printing and a proper zero-calibration is crucial to the success of the printing progress.
What is Zero-calibration?
The figure below shows how the end stop is triggered during homing. When the platform is homing, the end stop plate will trigger the end stop before the platform actually reaches the floor (the FEP film). If the printer is calibrated, the platform will keep moving down until it reaches the floor. We call the position where the end stop plate first triggers the end stop, the MACHINE ZERO. And we call the position where the platform reaches the floor, the HOME ORIGIN. The zero-calibration procedure finds out the distance between the two positions, we call it the ZERO-CALIBRATION DISTANCE.
Although we want to leave some safe distance between the platform and the FEP film to prevent pressing your LCD panel. The safe distance has to be properly set or your printing might fail. Keep reading the steps below to learn how to properly zero-calibrate your MODEL V.

How to perform Zero-calibration?
-
Fill a small amount of resin that you normally use in the vat (enough to fill the bottom of the vat). The reason for this step is that during homing, there will be a resin layer caught up between the platform and the FEP film. Each resin has different viscosity. Higher viscosity resin tends to form a thicker layer as they are harder to be pushed away. If you calibrate your printer without resin in the vat, you might pressure your LCD panel during printing.
-
Use Arduino IDE's Serial Monitor or NanoDLP's Terminal to send Code: G100 to your printer. This code will bring the platform to Machine Zero.
-
Use your hand to slowly and carefully turn the lead screw to move the platform down to the floor. Feel the resin and observe if LCD panel is pressed. Move the platform too far down will put pressure on the LCD panel, on the other hand, your print may not be sticking to the platform. So you might need to do this a number of times before you get the hang of it. DO NOT use any tool to turn the lead screw but your hand. Wear gloves as the lead screw may have oil or lubricant on it.
-
Send Code: M171 to your printer. This code will tell the printer to move the platform upwards while measuring the distance until the end-stop trigger is released. The distance measured is the zero-calibration distance. The printer then writes this distance into its EEPROM. This distance normal is between 1 to 3 mm.
-
You can read back the zero-calibration data by using Code: M181. It is recommended to double check if the return number matches up with the zero-calibration distance. It is normal if you find a small difference sometimes between them (normally around 0.01-0.02 mm).
-
Send Code: G28 to your printer. This code will bring the printer to HOME ORIGIN. You will see the platform go up and down a few times to clear away the bubbles draped under. If you do not see this up and down movement, there might be an error in the steps above. Try again from the start. G28 is the default homing command for both Creation Workshop and NanoDLP. Once the calibration is completed, you can just use G28 to home the platform. REMEMBER: if you don't see the up and down movement when you send a G28 code to your printer, it means you do not have a valid zero-calibration data. Use a serial monitor to see what information returns from your printer may help you learn more.

You only need to re-calibrate your printer if you:
-
changed your resin into a whole different type (noticeable difference in viscosity);
-
changed to a different thickness FEP film;
-
replaced the platform;
-
replaced or adjusted the platform arm;
-
replaced or adjusted the z-axis or the z-axis carriage;
-
replaced the LCD panel;
Or any other reason you believe a zero-calibration is needed.
You might want to re-calibrate your printer if the print does not stick to the platform.
B. Preparation
-
Make sure the vat and the platform is clean, dry and no resin residues left from the last print.
-
Shake the resin well and wait until the resin rests before filling in the vat. Remove all the bubbles before printing.
-
Fill the vat with the resin you want to use. Remember that once the platform has homed, the resin level will rise about 30%. Make sure you don't over-fill the resin.
-
Fill in the resin before homing the platform. Otherwise, there won't be any resin under the platform for the first layer.
-
If you are printing with the resin left from the last print, make sure there are no cured (broken off) parts left in the vat. Clear them out before homing the platform; large residues can damage the LCD panel.
VIi during printing
A. Keep The Lid Closed
The lid will block UV light from traveling through in both ways. So it protects the resin from being cured by the light outside and it also protects you from UV exposure from the printer. Keep it on during printing unless the printing is stopped or paused.
B. Do Not Move The Printer
Try to keep the printer stable during printing. Do not move the printer, do not shake the table or desk where the printer is placed.
C. Re-fill Resin for Large Print
When you are printing large object. The vat might not able to hold enough resin to finish the print. Before printing, you should check the volume of your print in the software. The vat has a volume of 350 ml. With the platform at the bottom, the volume reduces to 270 ml. If you fill the vat 85% full, you will have 230 ml resin to print. If it is not enough, you can re-fill the vat in the middle of the print by the following steps:
-
Pause the printing in the software.
-
Open the lid slowly and carefully.
-
Re-fill the vat with more resin from the corners, make sure you shake the resin already and not to touch the print.
-
Make sure there are no air bubbles.
-
Put the lid back on.
-
Resume the printing in the software.
VIii after printing
A. Remove The Platform From Your Printer
Remove the platform from your printer first by removing the thumb screw on the platform holder. Tilt the platform to allow the remaining resin to drip back to the resin vat. Use paper towels to hold the platform to prevent the resin dripping.
B. Remove Print From The Platform
Remove the print from the platform using a blade, the scraper or other sharp tool. Please be careful not to scratch the platform and Please be even more careful not to slip and cut yourself.
C. Recycle Remaining Resin
If you are not going to print shortly or you need to change resin, remove the vat from the printer pour the resin back into its container. You may want to check if there are any broken-off parts left in the vat first. You can do so by using the scraper to swipe the resin from side to side to see if there is any solid object in there. Pick them out with tweezers. If you are going to print again in a short time, put the lid back to protect the resin from curing.
DO NOT leave resin in the vat for too long if you are not going to print shortly. The resin vat is not a container.
D. Wash Your Print
There are two ways to wash your print that we recommend. One way is to use 91% or 99% Isopropyl Alcohol (IPA). Submerge your print in a container of IPA for 3 minutes. Then, swirl it around in the IPA to rinse off the extra resin. Additionally, you can use a squeeze bottle to rinse off the extra resin. IPA is a highly volatile substance and can be harmful to your skin. Clean your print with IPA in a well-ventilated area and wear gloves, eye protection and even masks if needed. DO NOT use IPA if you are allergic to alcohol or alcohol can cause you discomforts. Contact your doctor immediately if you feel unwell.
The other way is to use dish-wash and an ultrasonic cleaner. Ultrasonic cleaning is a process that uses ultrasound (usually 40 kHz for home ultrasonic cleaners) and an appropriate cleaning solvent to clean items. In this case, submerge your print in the ultrasonic cleaner with water and some dish-wash. Run the cleaner for 5-10 minutes (depends on the power rating of your cleaner) to achieve the best cleaning result. For some complicated parts, ultrasonic cleaning is much better than using IPA. Besides, dish-wash is much more skin-friendly, smell better and cost less. But still, wear gloves and eye protection. Put IPA in an ultrasonic cleaner is not recommended as the ultrasound will make the IPA vaporize much faster. But you do use IPA, DO NOT use the heater function on the ultrasonic cleaner.

D. Clean Your Printer (Important)
You can use IPA and scrub sponge to clean the vat and the platform. You should make sure all resin (cured and uncured) residues are all cleaned off the platform for the next printing. You can use a scrub sponge to scrub the residues off easily and keep the building surface fresh. You should always clean the platform after printing instead of just leave it uncleaned.
Leaving residues in the resin tank may cause failure to the next print. Large residues may cause damages to the LCD panel. You can use an ultrasonic cleaner and some dish-wash to clean the vat and the platform. Also, check if there is resin dropped on the printer or the LCD panel. Wipe them clean with paper towels dipped with IPA.
Ix post process
A. Support Removal
The support structure is broken off or cut from the model by hand or by model clipper. Please be extra caution when using sharp tools during this process. After the support structures are removed, t may leave a bumpy surface on the surfaces in contact with support material. If a high-quality surface finish is required adding extra material (at least 0.1 mm) to be sanded afterward allows for better dimensional accuracy.

B. Post-Curing
Once printing is completed, the parts remain on the platform has not reached their most stable conditions. Their mechanical and thermal properties are not yet fully set.
Post-curing is an easy but important step to strengthen and stabilize parts. It is even more critical for Functional parts. Post-curing can be done with sunlight, or with a UV chamber.
Post-curing with sunlight:
Fill a clear container with tap water, and submerge the parts into it. Place the container under direct sunlight for 15 minutes, till the parts don’t feel uncured or sticky.

Post-curing with a UV chamber:
If you are post-curing with a UV chamber, first, make sure you understand how to protect yourself from UV radiation. Second, depends on the UV light power rating, you need to post-cure your prints for 5-10 minutes. There are products designed for post-curing SLA prints you can buy or you can DIY one. Please check out the video below to learn how to make a UV chamber yourself.
During the process, oxygen in the air diffuses into the out layers of resin, preventing the print from fully curing. Submerging the print in water prevents oxygen inhibition, and thus allowing the UV light to cure much faster. This mainly accelerates curing of the surface. Interior structures of the print still take time to cure because of ambient UV light exposure.

C. Wet Sanding, Polishing and Clear Coating
If you are trying to make parts has a mirror-like smooth surface. Or when you are printing with clear resin and trying to make crystal clear parts. You should consider using the techniques introduced here.
Wet sanding generally achieves the smoothest surface finish (depending on the number of sandpaper graduations used). On the unsupported side of the model, only the build lines need to be sanded. This can typically be achieved with a single high grade of sandpaper (no graduation needed) making the finish a lot cheaper. The supported side is more labor intensive typically requiring at least 4 sandpaper graduations. It is, therefore, best practice to place the supports on the least visible part of the model. Depending on the support placement there may be some accuracy loss as the material is removed through the sanding process.
Mineral oil finish:
Adding mineral oil to the prints after the sanding process also helps to hide the white/light spots on the model creating a nice even finish. This finish is well suited for mechanical parts reducing friction and lubricating the surface.
Clear coat (clear UV protective acrylic):
Spray painting the model helps to conceal layer lines reducing the need to sand the unsupported side of the model. The varnish also protects the model from yellowing and post-curing by limiting UV exposure. Acrylic paint will not adhere well to flexible resin. If flexible resin needs to have a glossy finish coating with a thin layer of resin then curing underwater can achieve this, however, this affects tolerances and details dramatically.

D. Painting
Painting your 3D printed parts can be a surprisingly easy process, capable of transforming rough prototypes into presentation-ready parts. Product designers, artists, engineers, and hobbyist all benefit from spicing up their prints with a bit of color.
Learn how to paint your prints with the YouTube videos below:
x replacing the fep film
A. How Often Do You Need To Replace It?
Normally, you want to replace the FEP film after 15-20 prints. If your FEP film still looks dirty and sticky after proper cleaning, or there is folds or scratches on the film, you will need to replace it. If your print continuously fails because the print sticks to the floor, check if your FEP film needs to be replaced. For some users, you can use one FEP film for more than 50 times. It highly depends on the type of resin you are using and how well do you clean your vat after each print.
B. How To Replace It?
-
Remove the old FEP film by removing all 22 screws and the stainless steel plate with a 2.5mm Allen wrench. You can use the Allen wrenches come with your printer. We also recommend you to buy a more handy Allen wrench screwdriver.
-
Clean the vat, the screws and the ring plate with IPA.
-
Make sure there is no water left in the screw holes. Place the vat on the table, the new FEP film in the middle, and the plate on top.
-
Hold the ring plate down and use a sharp tool to pop a little hole in each of the four corners. Be very careful not to cut yourself. Find someone to help you if needed. (1)
-
Put a screw into each hole of the four corners. Do opposite side corner one by one. Do not tighten them down before you have all 4 corners set. Tight all 4 screws but NOT over-tight the screws. (2)
-
Do the same all the way around, making sure to equally do both the up and downsides to prevent too much tension on one side. (3)
-
If you are not using our pre-cut FEP sheet, cut off the excessive film use a sharp blade. Make sure you don’t tear the film. Be very careful not to cut yourself.
-
Clean up both sides of the FEP film, using a clean rag with some IPA. (4)

Make sure you wipe the vat dry bottom and top after each time you clean them. Replace the screws if you find rust on them. You will find a few replacement screws in the accessory box came with your printer. If you need more vat screws, you can order from our store or buy them yourself. The screws you should buy is M4x8 Metric Super Corrosion Resistant 316 Stainless Steel Button Head Hex Drive Screws.
C. Where To Buy FEP Films?
You can order our premium pre-cut FEP sheets from our store. Go to "BUY NOW" and go to "Replacement Parts".
xI Help and learn

Join XAYAV Facebook MODEL V Group

Join XAYAV Facebook MODEL V Dental Group

Join XAYAV MODEL V Technical Forum for online support

Follow us on Twitter

Follow us on Instagram and Post with #XAYAV
xiI printer specification
XAYAV MODEL V
High Resolution Desktop 3D Printer
Technology:
Wavelength:
Curing source:
LCD screen:
Z accuracy:
Layer thickness:
Max. printing volume:
Building speed:
Vat size:
Vat volume:
Slice Software:
Firmware:
Resin type:
Printer Size:
Printer Weight:
Power input:
Warranty:
Product origin:
LCD-based SLA 3D printer
405 ~ 410 nm
30W UV LED
2560x1440 (47microns pixel size, 538 PPI)
< 5 microns
15 ~ 150 microns
121x68x200 mm
Up to 50 mm/hour depends on the resin
184x126 mm (outer)
152x94 mm (inner)
350 ml (270 ml with the platform in)
Creation Workshop
NanoDLP (requires additional hardware)
XAYAV MODEL V custom firmware
Most 405nm UV 3D printing resin
20x19x40 cm
5 kg
85 ~ 265 VAC 47 ~ 63 Hz 2000mA Max.
1-year limited warranty
Designed in USA, assembled in USA